
This tutorial will cover setting up the video driver (after installation) and connecting to various video feeds. It will cover adding and removing feeds, configuring basic video functionality and analytics.
Basic Requirements
For Limelight XE to process video, the video driver must be installed. This can be done during initial installation or afterward by running the installer and checking the box in the Custom Install option under Video. The Limelight XE service will be automatically stopped and restarted after the driver is installed.

The video driver is based on the industry recognized FFmpeg libraries which provides incredible flexibility in decoding various video sources. Video can be analyzed for simple motion detection or more elaborate object detection, counting and heat mapping. If recording is required, sufficient disk space must be provided to hold video clips with the lowest latency. It is recommended that video be stored on a local drive where the Limelight XE server is installed.
Source Specifiers
The video driver properties include a string for the video source - this includes a specifier for the transport / control protocol (e.g. rtsp://someuri/live.sdp). Here are a list of the major supported specifiers and their use, but there are many more. See the FFmpeg supported protocols for a complete list.
- Real Time Streaming Protocol (RTSP) - is a network control protocol supported by most IP cameras (e.g. surveillance cameras). Example: rtsp://vss15od.dot.ga.gov:80/cl/gdot-cam-i-85-035.stream (GDOT traffic camera on I-85, more can be found here).
- Real Time Messaging Protocol (RTMP) - is used for streaming multimedia content across TCP networks.
- Hyper-Text Transport Protocol (HTTP) - is an application layer that can be used as network control for video streaming. Example: http://somecoolonlinevideo.m4p3.
- HTTP Live Streaming (HLS) - is an Apple standard media streaming protocol for delivering visual and audio media to viewers over the internet.
Local web cameras can also be connected to the driver, however these devices are not compatible for recording due to incompatible compression formats. You can still analyze the video for motion or object counting which can be reported or recorded. Locally connected (e.g. USB) web cameras use the path /dev/video followed by a number (0-n). For example, the first USB web camera device would have the path /dev/video0.
For IP security cameras, refer to the supplier for the correct URL path to use in the Video Source property. There are also extensive lists on the Internet such as this one on Security World. You can also connect directly to Digital Video Recorders (DVRs) to access any camera connected to them. See the manufacturer for the correct URL to connect via RTSP. Many times DVRs will have a home URL that allows a user to see all cameras in one frame and additional URLs for each camera. This can be used to do non-recording analytics out of band of the DVR (i.e. the DVR is recording video, analytics are being performed by Limelight XE's video driver).
Setting Up a Video Source
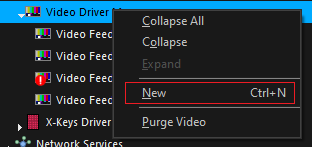
To create a new video object that will connect to a video source, select the Video Driver Manager object in the components tab of the Limelight XE console and right click. A pop-up menu will appear - click New (optionally you can press Ctrl-N which performs the same function).
A new driver object will appear below the Video Driver Manager object and will default to Video Feed X where x is the next available object (you can rename it to anything you like such as Front Door Cam). Select the new video object and on the right panel select the Properties tab. Here you can see the entire list of all the properties of this object - there are over 50. You can always make adjustments here but this object has a configurator available which makes setup much easier. Click the Configure tab and the configuration panel will appear.
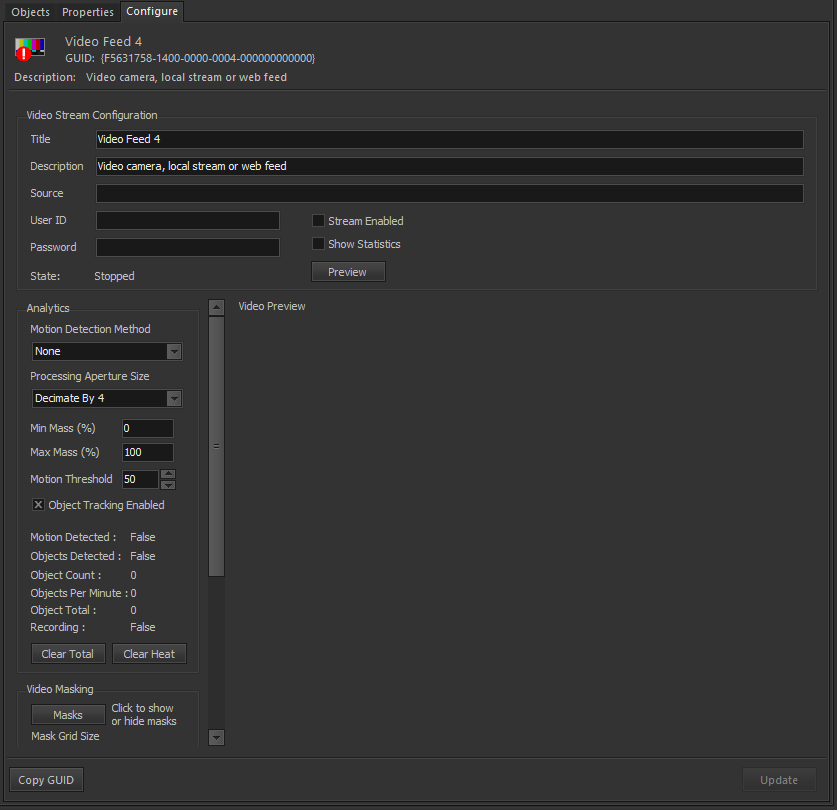
The configuration panel will be populated with the default values.. the most important (source, user ID, etc.) are located at the top. This panel also has some additional controls for handling masking and heat mapping (more on this later) and viewing the actual source (Preview). To get started enter a valid url into the Source edit box along with any required credentials (located in the Video Stream Configuration group box) and (very important) check the Stream Enable check box. Now click the Update button in the lower right corner - this will update the values and (if the stream is enabled) attempt to connect to the video source. The progress of the connection process can be viewed in the Video Stream Configuration group box by watching the State property. If successful it will cycle through "Opening Source", "Buffering" and finally "Playing". Other states such as "Recording", "Loss Of Signal" or "Reconnecting" will appear here as well as the state changes.
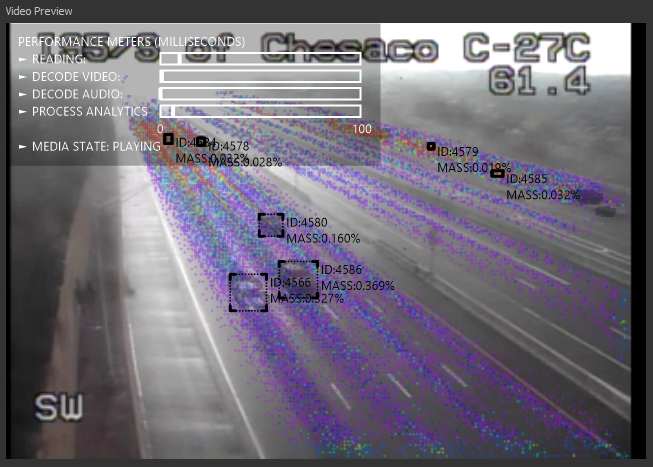
To view the video press the Preview button near the top - if the video is playing, it will appear here (default size of the preview pane is 640 x 480 pixels but can be altered to larger or smaller formats). This preview video also contains motion information, object detection and heat-map overlays. Optionally it can also overlay the video processing statistics which can be extremely helpful for debugging video streams. To enable the video statistics overlay, click the Show Statistics check box in the Video Stream Configuration group box and click Update - see example below.
Example Video Feed from Traffic Camera with Object Detection, Heat Mapping (false color) and Statistics Overlays
Adjusting Analytic Parameters
The Limelight XE video driver provides many properties that allow a user to "tune" the detection and analytics engine. Currently only static (fixed) cameras can be analyzed - future releases will support dynamic (moving) cameras such as vehicle or PTZ cameras for analytics. Primarily this limitation is in how the non-moving objects are separated from those that move (which are the target of the analytics). To enable detection, Select "Static" as the Motion Detection Method (default is None or disabled). The various parameters are defined below
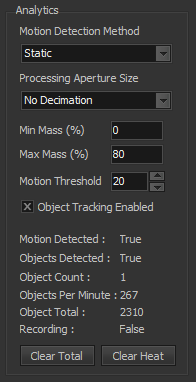
- Motion Detection Method - Sets the method for extracting moving objects from video frames (None, Static)
- Processing Aperture Size - Optionally reduces the image size that is sent to the motion extraction algorithm which can reduce processing overhead. Options are
- No Decimation - stream and processing image are the same size
- Decimate by 2 - analytics image is scaled by a factor of 2
- Decimate by 4 - analytics image is scaled by a factor of 4 (default)
- Decimate by 8 - analytics image is scaled by a factor of 8
- Decimate by 16 - analytics image is scaled by a factor of 16
- Min Mass - This is the minimum mass (in percent of analyzed image size) that will be detected (default is 0)
- Max Mass - This is the maximum mass (in percent of analyzed image size) that will be detected (default is 100)
- Motion Threshold - This sets the sensitivity of the detection algorithm and is based on how far a pixel intensity is from the same pixel in the background image. Default is 50, range is 0-255. Recommended settings are between 10 and 70 - the lower the number the higher the sensitivity.
- Object Tracking Enabled - This enables object extraction and tracking (required for counting objects and recording on object detection). Default is false.
- Motion Detected - Boolean state of motion detection engine (true when motion detected)
- Objects Detected - Boolean state of the object extraction engine object count (true when the count is greater than zero)
- Object Count - Instantaneous integer count of objects being tracked (real time)
- Objects Per Minute - Moving average of objects detected per minute
- Object Total - Running total of all object detections. Write a zero (0) to this property to clear it or press Clear Total.
- Recording - Boolean state for recording (true when video is being recorded to disk).
- Clear Total Button - click to clear the running total
- Clear Heat Button - click to clear the heat map overlay on the video preview window.
Configuring Video Masks
Video masking is a very powerful feature which can be used to remove unwanted areas from the analytics. It can be used to mask out objects that move with weather (e.g. plants and trees), remove traffic from analytics (e.g. count only one direction) and more. Masks form a grid over the analytics image and is automatically scaled with processing aperture size.
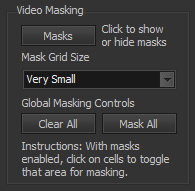
- Masks Button - Click to show or hide the video mask grid
- Mask Grid Size - Allows the cells of the grid to be resized to provide more or less resolution
- Clear All Button - Clears all mask cells (caution - this cannot be undone)
- Mask All Button - Sets all mask cells (caution - this cannot be undone)
To adjust the mask, you must be previewing the live video. With the mask enabled click cells you want to toggle. Holding the Shift Key will always set a cell. Holding the Control Key will always de-select a cell. Dragging a window does these functions for an area.
Configuring Video Recording
Video recording options are found below the video masking options. Recording is disabled by default and must be enabled to record to disk. Recordings are stored in Matroska Multimedia Container format which is directly playable with Windows Media Player. Before enabling any video source to record it is recommended the primary video recording location be set in the properties tab.
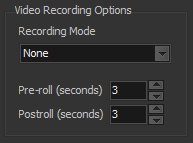
- Recording Mode - Selects when to record video to disk. Options include:
- On Motion Detected - Records when any motion is detected
- On Object Detected - Records when one or more objects are detected
- Pre-roll - Number of seconds of video to append to the front of the recording before the detection event.
- Post-roll - Number of seconds of video to append to the end of the recording following the last detection event. If another detection event occurs during the post-roll time, it is reset and recording continues.
Additional Resources